![]()
![]()
One of the biggest pains you can have in overhaul/restoration is trying to use old “hardware” as is a commonly used term in the aviation industry to describe the typical nuts, bolts and screws etc used to hold the thing together. In aircraft many nuts and bolts are “lifed” for relatively short periods more so particularly in helicopters where most are mandated to be thrown away when any disassembly takes place and also at amazingly short intervals where called up on specific service bulletins.
Why then do we restore some 40 to 50 year old motorcar to good condition but use the old hardware to hold it together? Rusty nuts and bolts take time to clean up and will always be suspect as to their integrity. It is easy enough to examine a used bolt by naked eye to establish if the thread is damaged but try looking inside a nut and you will really never know if it was OK. Is it because of the prices you see in local automotive retail sources on blister packs on racks in the store? I noted that a blister pack of 6 UNF ¼ inch nuts cost $2.50 [approximately 42 cents each] in a local retail store.
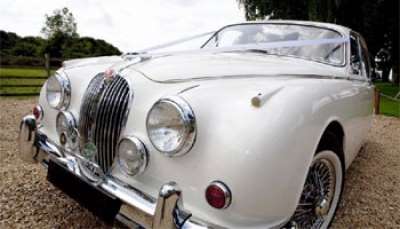
I recently started on the interior of the white MK 1 and found that there were a number of nuts and associated hardware missing from the wood dashboard panel areas. These nuts are typically ¼ UNF. I dropped into Queensland Fasteners in Robinson Road, Geebung and bought a hundred nuts for $6.40 [or 6.4 cents each.]. Compare the above prices and somebody is paying the 500% mark up in the blister pack.
While I was there I checked on the price of 5/16 UNF zinc plated nuts which hold the exhaust manifold on the XK engine head and they were more expensive due to the plating and worked out at $14.00 per hundred or [14 cents each]. Considering an XK engine exhaust manifold uses 16 of these nuts you would have an outlay of $2.24 to use new nuts when assembling it to the engine head. Pretty cheap isn’t it in the overall cost of engine repairs and overhauls? But you could cut costs by using non-plated nuts if you were really desperate as these are typically 8 cents each.
I also keep a couple of containers of 10-32 UNF nuts and appropriate washers on hand as they are commonly used on trim items in all Jaguars from the MK 7 onwards. The cost is around $3.00 a hundred for nuts and the washers come real cheap at about 1 cent each.
In the front-end department many of the early Jags used Nylock nuts to hold things together. That is a nut with a nylon insert which provides a friction hold to stop the nut from coming loose. I bought an entire set of nylock nuts for the front end of a MK 1 which is basically the same as a MK 2/S type /420 for under $20. In the aviation industry a nylock nut is a one-use device and I will always treat them the same in critical areas of a motor vehicle
Now before you all start phoning me and telling me I have got the prices wrong just do some basic homework and don’t – please don’t tell me the price you were charged in a miserable blister pack of nuts and bolts you obtained from your local automotive retail outlet. Go to a professional outfit and buy these parts at the right price and don’t get ripped off. Please note that the prices I have quoted are standard retail prices from Queensland Fasteners for small quantities and you have to be involved in the thousands of nuts and washers to get better [trade] prices.
If you are getting involved in an overhaul/restoration you may be pleasantly surprised to find out how little it costs to use new “hardware”.
Like many apprentices I learnt basic welding and have used this skill from time to time. But like a lot of skills they can get rusty without regular use. A few years ago I did a basic panel-beating course at Bracken Ridge TAFE and they accepted my previous training in lieu of the otherwise mandatory oxy acetylene-welding course prior to the panel-beating course.
A friend who is a JDCQ club member accepted a transfer to another state and offered me his oxy acetylene-welding outfit at a very reasonable price. I have since used it for numerous jobs, which primarily involved heating but had not got around to any serious welding.
During my last period of holidays I decided to remedy this by getting in some serious welding practice on bits of discarded Datsun 120 Y panels and the remains of a XJ 6 tank cover panel. Finally I felt confident enough to have a go at some rust repairs and skin cracks in one door of the MK 5 and I am happy with the results.
I recommend that persons who have never been involved in welding or panel beating check out the TAFE courses available, which appear to be published every semester. You need to be quick, as these courses are very popular and get filled up quickly.
Tools We had interesting results on my article on “tool snobbery”. One club member quite correctly endorsed the view that if you have to use them every day in business then only the best will do and I go along with that concept. At the same time I have had some club members tell me of visits to their local pawnbroker where they secured tools at very little cost.
This magazine is widely circulated and the readers will involve professionals and amateurs from all walks of life. It is not my role to tell people how to go about their business. The article was intended to alert club members to alternatives in sourcing tools and from feedback it appears to have achieved that result.
I walked into a major aircraft maintenance hangar some time ago and was surprised to note the number of expensive lockup wheel around toolbox systems stacked up against one wall of the hangar. There were at least 20 of them. In discussion with an aircraft engineer acquaintance I have known for decades [he is as old as me] he mentioned that the toolkits belonged to aircraft engineers and apprentices who were on night shift.
The majority of the toolboxes were one particular brand. My acquaintance explained that there is a certain amount of “snob” value amongst aircraft engineers over tools and equipment and some, particularly the apprentices, are up to their necks in debt paying off these tools to this specific brand's traveling van operators who call on a weekly basis. He estimated that most of the toolboxes with contents had cost over $3000.00.
When I asked him what he personally used he showed me a relatively modest toolbox with an assortment of well-maintained spanners etc. that bore a number of brands. One point on which we both agreed was that early Australian made “Sidchrome” spanners were as good as anything the rest of the world had produced. He reckoned it would cost less than $1000 to replace his toolbox with all new items.
Isn't it strange how people get hooked into unnecessary expenditure when trying to "keep up with the Joneses"?
Spanners My engineering acquaintance also privately helps maintain some early English aeroplanes such as Austers and Tigermoths, which used BSF [British Standard Fine] spanners. A full selection of these spanners was available in his toolbox much to my envy, as you need them to work on Jaguar Mk5s and earlier models.
When pressed as to a source of these BSF spanners he then admitted to a deep dark secret that he regularly checks out pawnshops. I have been doing this now for some months and have steadily accumulated a range of BSF spanners. I have also acquired some of the better brand SAE [standard american engineering] usually known and marked as AF [across the flat {of the nut}] for some remarkably cheap prices such as $1 to $2 each
If you decide to check out these sources of second hand tools don’t let the rusty appearance or tarnished chrome put you off. As long as the spanner is not worn out it will be OK and a clean up with a rotary wire brush and a coat of clear lacquer or light machine oil will keep it looking good.
It just goes to show you that you don’t need to spend a fortune to accumulate some very good tools which will probably last the hobby mechanic a lifetime. I can identify spanners that I purchased over 40 years ago from a deceased mechanic’s estate and are still in good working order.
As a tip keep an eye out for brands such as Sidchrome, Dowidat, Proto, Snapon and Starwillie. Don’t let the name Chrome-Vanadium swing you as this appears to be a common generic name for tool steel and bears little guarantee as to quality.
Screwdrivers Whilst on the subject of tools most people are still using general screwdrivers that get worn and relatively useless for their designed function over a period of time. Although I personally have several sets of el-cheapo screwdrivers for light general work I have primarily 2 screwdrivers, which are called into action when I have tough jobs to carry out.
One is an ex-army wooden handled large flat blade screwdriver with a shaft 12 inches long. This is ideal for dealing with engine hose clamps. The other screwdriver has a magnetic socket with a 6-inch shaft and is capable of taking replaceable tips. These replaceable tips are ¼ inch hexagonal and come in a wide variation of types ranging from flats to Phillip heads. Most people think of these replaceable tips as being used in electric screwdrivers.
The beauty of these replaceable tips is that are throwaway items. If a tip is damaged you don’t throw the screwdriver away. You just fit a new tip. A new tip costs between $1 and $2 and you always have the perfect screwdriver rather than battling on with a tip that is damaged and damaging the screw head.
Another advantage is that you can carry an assortment of various types of spare tips with you so the same screwdriver can attack a multitude of screw types. You can also get a fitting, which will allow ¼ inch sockets to be driven by the screwdriver as well as specific tips for Allen keys, and other security bits used on car radios etc. Another advantage is that the magnetic part of the screwdriver holds the screw to be held by the head both when inserting and extracting the screw which is very useful when working in a one handed situation.
Don’t buy an el-cheapo handle with a number of tips supplied in a molded plastic packet from a typical supermarket system. It is worthwhile purchasing a good handle and tips from a proper tool supply house. The handle I currently have is about 17 years old and the previous one was 13 years old when eldest son lent it to somebody who never returned it.
Most of us equate air compressors with spray painting and don't realise what a handy item they are for general maintenance and restoration of our vintage and not so vintage cars.
Air compressors come in a multitude of sizes and shapes ranging from simple little $20 tyre pumps which connect to the cigarette lighter up to huge diesel powered devices you see being used to drive jack hammers on road and building construction sites. They all use the same principle of compressing air and using it to perform a function. Somewhere in between you can make a choice of a compressor which will suit your needs. The criteria or measurement of an air compressors capability is expressed in cubic feet per minute which is generally abbreviated to CFM or sometimes CM. This expresses the compressors ability to produce the amount of compressed air. This by the way has nothing to do with the size of the receiver which is the tank which holds the compressed air after it is produced. I will refer to the combination of the air compressor and the receiver tank as a "unit".
Most air compressors of the type we will talk about generate around 120 pounds per square inch [PSI] air pressure which will then need to be passed through a regulator to control the pressure to lower levels eg 40 PSI for spray painting. They also need a water trap to eliminate water from the compressed air.
The first important principle is to make sure you purchase a unit which will do the job you want it to. Don't buy the cheapest one around as you may be disappointed with the results. The general rule is to buy as large a unit as possible. It is better to have a unit which can handle the load on an intermittent run basis rather than something running flat out all the time and failing to deliver air that is needed.
If you intend to do some spray painting as well as running air tools such as air drills and sanders I recommend you look seriously at a 13 CFM unit. To go any larger generally requires some special wiring in your house or shed as you will need a 15 amp electrical outlet. The standard household electrical wiring system is for a 10 amp outlet. You can pick the difference on the 3 pin electrical plug as the earth pin is significantly wider on a 15 amp plug. It is interesting to note that you can now buy 13 CFM units for around the $800 mark which is over $100 cheaper than the price I paid for the same brand unit about 9 years ago.
The size of the receiver is also important. Even a 13 CFM unit with a small receiver may be a problem to you in that it lacks reserve capacity to keep up with very large intermittent demands placed on the unit when spraying whole cars or operating some air tools for long periods. I note that some of the imported units which appear to be made in Italy have relatively small receivers.
There are numbers of units for sale on the second hand market. Be wary, as a lot of them are pretty well worn out having been used by builders as a source of compressed air for nail guns. Many have had a real flogging having been used for 8+ hours a day for years. The majority of these are 8 to 10 CFM units. There are quite a few of these coming onto the second hand market as the building industry is currently changing over to "gas guns" which electrically ignite a gas charge from a small cylinder held in the gun. [much more portable]. It is better to go for a new unit as it should last a hobby type user for life however you might pick up a bargain unit from a builder.
My own unit is a 3 cylinder 13 CFM Airmac which is Australian made and has not given me any trouble during the 9 years I have had it. There are also a number of imported types on the market at similar prices but I prefer to keep the money in the country and at least spares are available if I ever need them.
When shopping around be a little wary on some of the "deals" which include air tools and spray guns as well as air hoses. Many of the spray guns are cheap and nasty and a lot of the tools are not much better. Remember that in this business you "pays for what you gets". Do make sure that the unit you are purchasing comes complete with a pressure regulator / water trap. You will also have to make a decision on what type of fittings you are going to use on your air pressure hose connection systems and how much hose you will need. Don't be tempted by the self coiling "spring type" hose you used to see in service stations. Unless you have a specific use for it, self coiling hose is a real nuisance when working with spray guns and air tools.
If you need a very long hose they can be an absolute pain to roll up and unroll just like your garden hose. A tip is to install a metal garden hose reel on the wall in your shed or workshop adjacent to the compressor. You can plumb the air through the reel just like water. It sure makes winding up and unwinding hoses simple We have used them for years in the aviation industry.
Now onto spray guns and tools. Spray guns come in several types and several prices. The panel beating industry standard is the Japanese IWATA series but they don't come cheap starting at around the $130 mark and going up of course. There are a few other types in competition such as the Binks made in the USA which are good but pricey. DeVilbiss and Wagner are also well known. As a general guide in guns you will need a 1.2 mm orifice nossle for spraying enamels, a 1.8 mm for 2 pack paints and a 2.2 mm for lacquers. For more information on spray guns talk to an automotive paint retailer. I also recommend Al. Probert's book "Spray Painting And Panel Beating In Australia".
In the cheaper guns there is low pressure/ pressure pot gun which typically retails for around the $30 mark which is very useful for spray putty, underbody coat and spraying fences with acrylic fence paint. Super cheap also sell a general purpose high pressure gun for about $69 which is quite good for undercoat and reasonable on lacquer. Their $39 high pressure gun is not recommended. Their touch-up gun around $55 is satisfactory.
Some of the air tools I have accumulated and found very useful over the years include-
Tyre inflation tool - built in pressure gauge - just like your local service station
Air duster gun - to blow dust and rubbish off the job. Blow out the workshop floor etc.
Kerosene pot gun. - degreasing engines; cleaning down major parts; spraying anti-rust. Also useful for spraying the weeds in the yard
Air ratchet spanner - really speeds up pulling things apart - be wary about use in assembly
Air impact wrench - wheel nuts off and on in a zip and very useful when removing head bolts or trying to undo large nuts on the suspension etc.
Air orbital sander - speeds up the bodywork process.
Air powered grease gun - simplifies the process when lying under a car. Better than trying to use the old mechanical grease gun in confined areas. Be careful as you can blow out seals on universals and rubber boots on steering components such as tie rod ends and ball joints.
Air chisel - invaluable for the serious restorer and I also use it to cut out the tops from drums etc. It can also be equipped with a bit to "buck" solid rivets.
Some other useful tools available include air powered drills and die grinders but as I have electric tools to cover these I haven't bothered to purchase them. I have drilled a few thousand holes in my time with air drills and they are excellent devices but hungry on compressed air. Their main value is in safety particularly working around aircraft where fuel vapours may be present.
A word of WARNING when using compressed air. Never point compressed air nozzles at yourself or any other person particularly in relation to body orifices as permanent damage to the human body can result. In addition small objects can be picked up and blown at high velocity and will penetrate the human body. Do take appropriate safety precautions applicable when using compressed air such as wearing a mask while spray painting and safety glasses when blowing out dirt and dust.
A small tip if you regularly use compressed air tools and then decide to use the same air lines for spray painting. It is worthwhile blowing some 50 mils of methylated spirits or methanol through the hoses prior to spraying to get rid of any possible moisture in the lines. The high pressure use of airlines associated with air tools appears to allow hot air from the compressor to bypass the typical water trap and carry moisture into the lines where it condenses. I have standardised on this procedure in my workshop and no longer get nasty moisture surprises when spray painting.
 1996 Jaguar XJ6 – Timeless Luxury & Performance Presenting a well-maintained 1996 Jaguar XJ6, a true icon of British automotive craftsmanship. With 327,952 km, this classic luxury sedan remains in good condition, offering a refined driving experience and an elegant design that stands the test of time. Vehicle Highlights: ✔ 4.0L inline-6 engine – Smooth and reliable performance✔ Well-preserved interior – Leather upholstery and wood trim✔ Comfortable & responsive ride – Signature Jaguar refinement✔ Good overall condition – Clean, well-cared-for, and mechanically sound This Jaguar XJ6 represents an excellent opportunity for enthusiasts and collectors alike. If you appreciate classic luxury…
 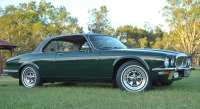 1977 Daimler Sovereign Coupe A Very Rare British Classic. Experience timeless elegance with this stunning BRG, sleek pillarless design, 4.2L engine paired with a smooth automatic transmission. A rare opportunity to own a limited production Coupe, only 1677 built, perfect for collectors and classic car enthusiasts. Price $65,000 Contact Ian McKinney Mobile 0438 733 140 Email ian-vicki@outlook.com Location Beachmere. 4510
  The January-February 2025 Edition of Queensland Jaguar Driver magazine is now online and available to members by logging on.
 | Sat Mar 22, 2025 @12:00AM Modern Compact Lunch |
| Sun Mar 23, 2025 @12:00AM Lunch Run to Murwillumbah RSL |
| Wed Mar 26, 2025 @10:30AM - Abbey Museum Tour |
| Mon Mar 31, 2025 @ 7:00PM - Gold Coast Monthly Meeting |
| Fri Apr 04, 2025 @12:00AM Jaguar National Rally 2025 |
| Fri Apr 04, 2025 @12:00AM National Rally to Bathurst |
| Fri Apr 04, 2025 @12:00AM RockyNats - Rockhampton |
| Sat Apr 05, 2025 @12:00AM Jaguar National Rally 2025 |
| Sat Apr 05, 2025 @12:00AM RockyNats - Rockhampton |
| Sun Apr 06, 2025 @12:00AM Jaguar National Rally 2025 |